Mold is not just an eyesore; it poses serious health risks, including allergies and respiratory issues. Effective mold remediation is essential to maintain a safe and healthy living environment. This step-by-step guide will walk you through the most effective water damage clean up techniques, ensuring your home remains mold-free.
Step 1: Identify Mold-Prone Areas
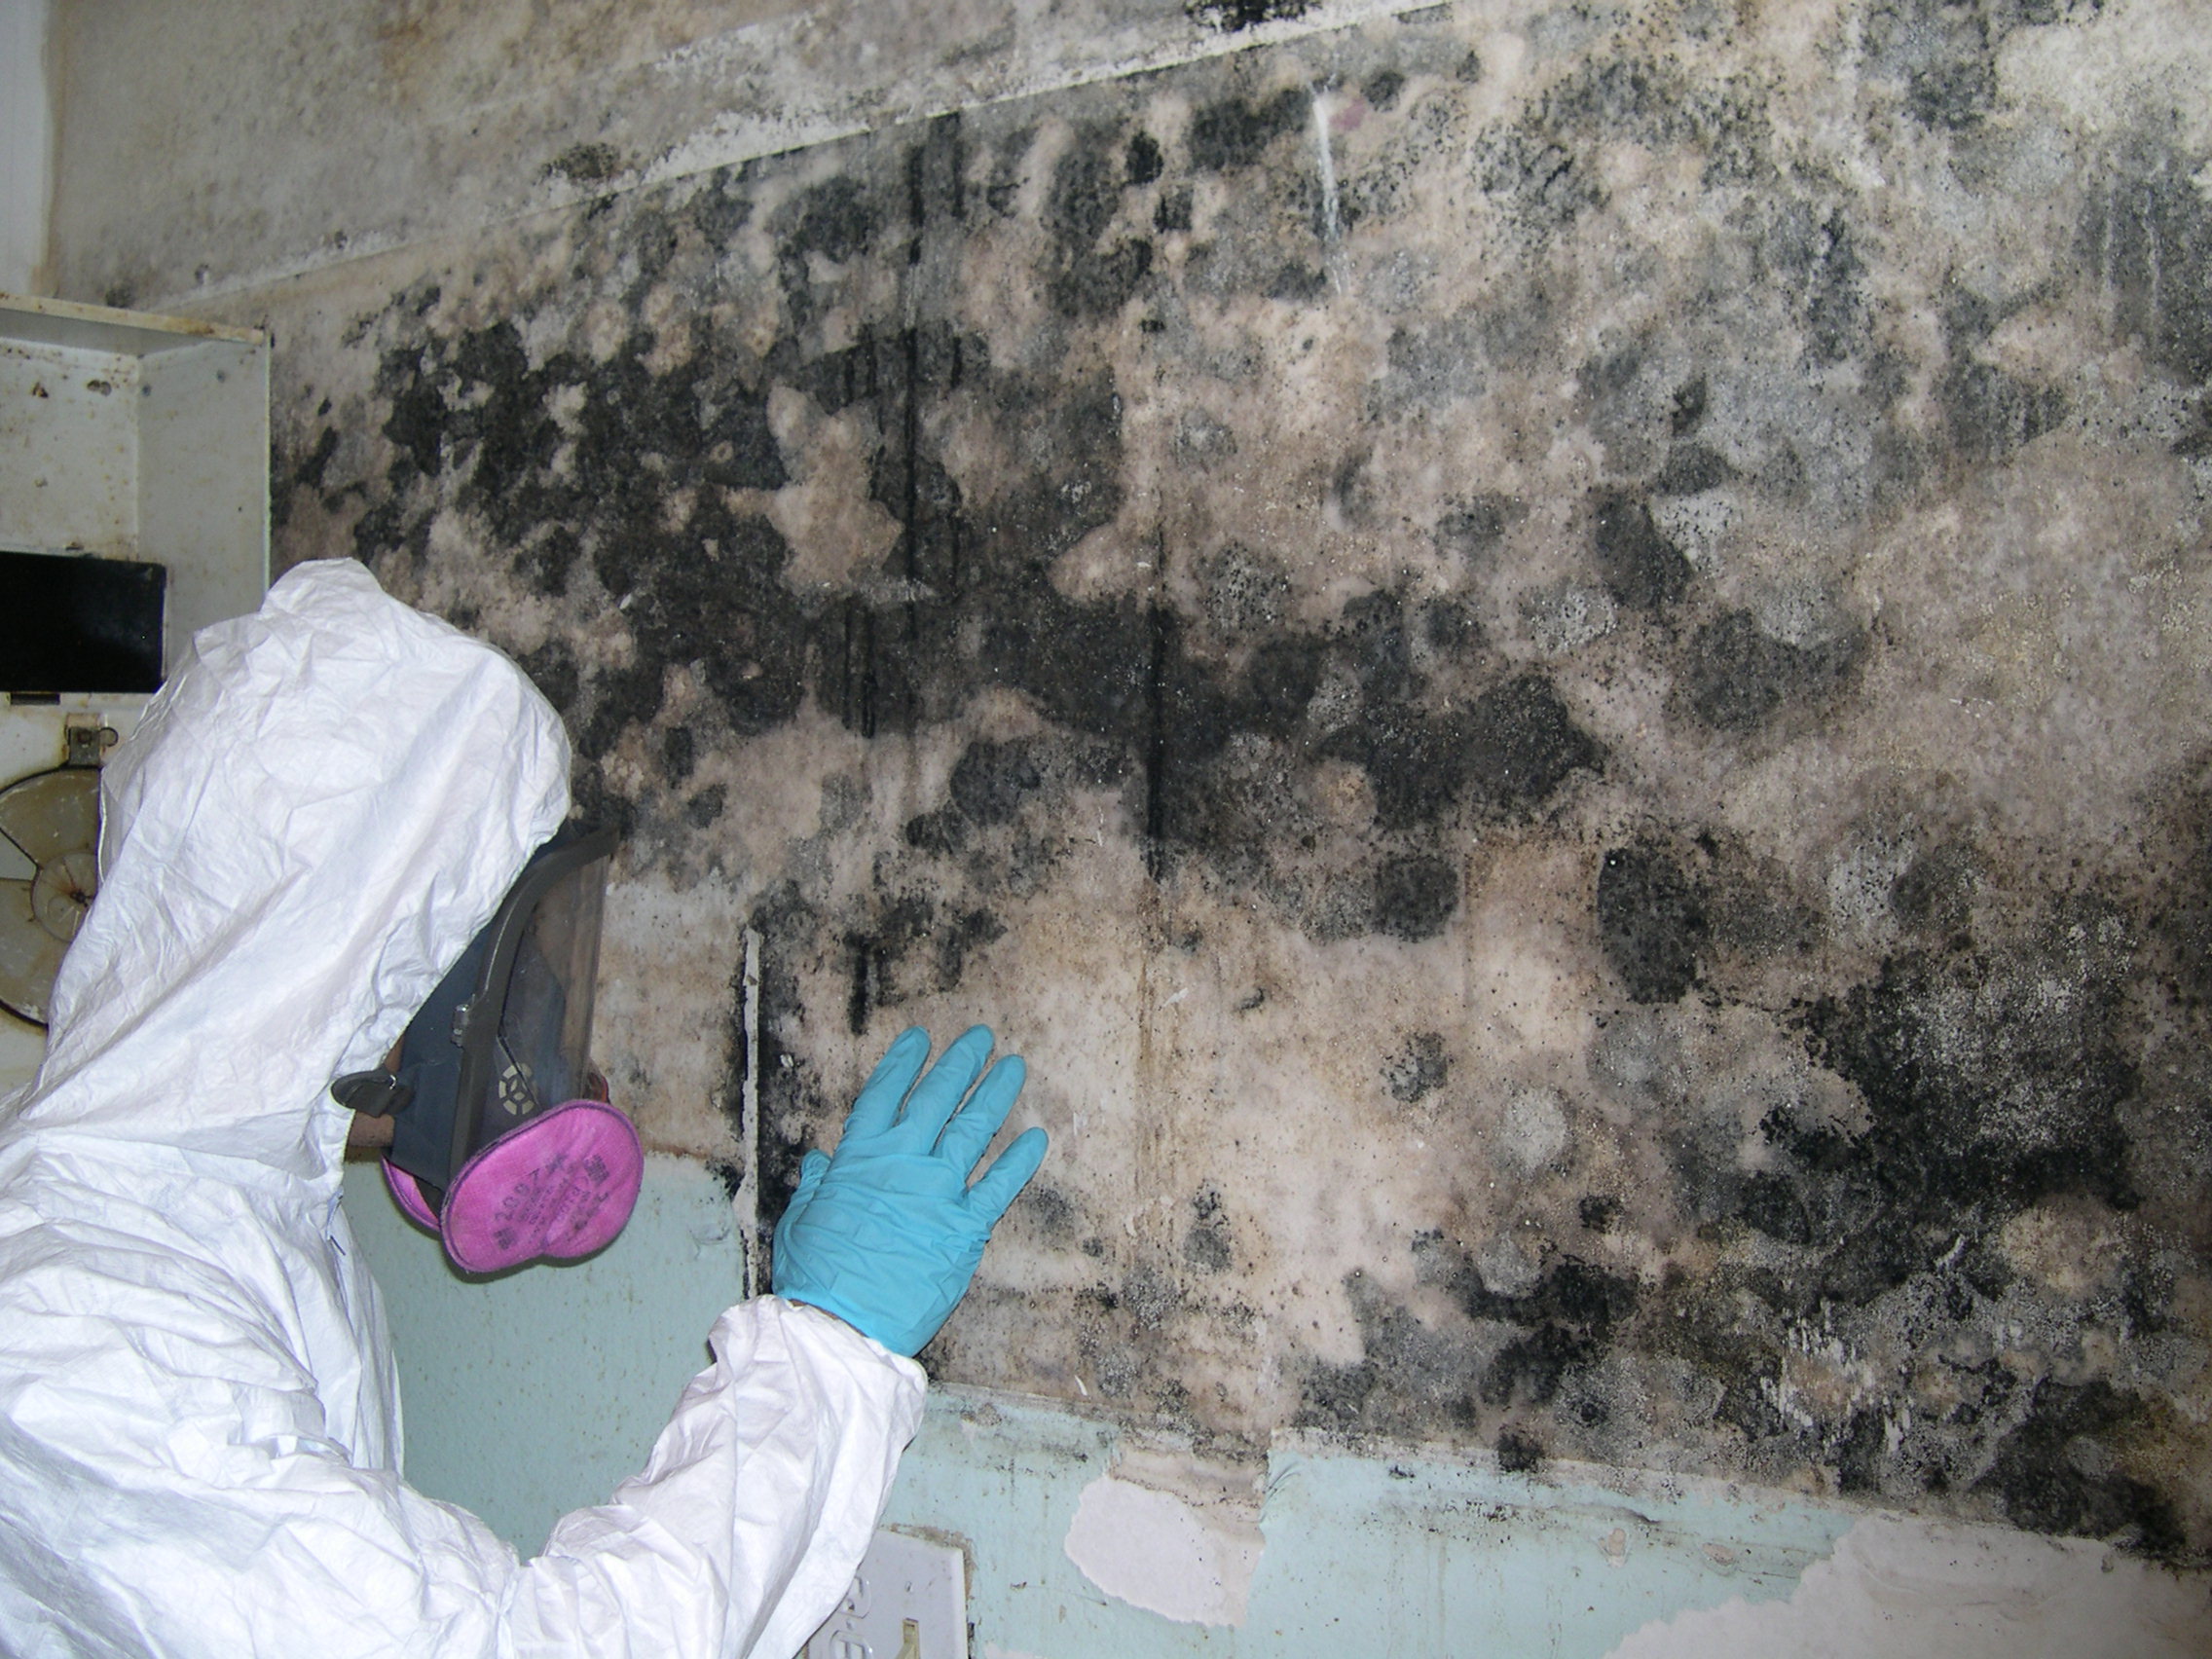
The first step in mold remediation is to identify areas where mold is likely to grow. Common locations include bathrooms, basements, kitchens, and areas with poor ventilation or recent water damage. Look for visible mold, which often appears as black, green, or white spots, and notice any musty odors that may indicate hidden mold growth.
Step 2: Assess the Extent of the Infestation
Assess the size and severity of the mold infestation. For small areas (less than 10 square feet), you might be able to handle the mold remediation yourself. Larger infestations typically require professional intervention to ensure thorough and safe removal.
Step 3: Ensure Safety Precautions
Safety is paramount during mold remediation. Equip yourself with protective gear, including gloves, goggles, and a mask (preferably an N95 respirator) to prevent inhalation of mold spores. Ensure that the workspace is well-ventilated by opening windows and using fans.
Step 4: Contain the Mold
To prevent mold spores from spreading during the remediation process, contain the affected area. Use plastic sheeting and tape to seal off the area and create a containment zone. This step is crucial to prevent mold from contaminating other parts of your home.
Step 5: Fix Water Issues
Mold remediation will only be successful if you address the underlying moisture problem. Identify and repair any leaks or sources of water intrusion. Ensure that your home has proper ventilation, especially in moisture-prone areas.
Step 6: Remove Mold-Infested Materials
Remove and dispose of any materials that are heavily infested with mold. This may include drywall, insulation, carpeting, and other porous items. Seal these items in plastic bags to prevent mold spores from spreading during disposal.
Step 7: Clean and Disinfect
Clean the affected area thoroughly using a detergent and water solution for non-porous surfaces. For more stubborn mold, use a solution of one cup of bleach per gallon of water. Ensure that the cleaning solution penetrates all mold-affected areas. Rinse with clean water and allow the area to dry completely.
Step 8: Dry the Area Completely
Drying is a critical step in mold remediation. Use dehumidifiers, fans, and open windows to thoroughly dry the area. Mold thrives in damp environments, so ensuring complete dryness is essential to prevent recurrence.
Step 9: Conduct a Final Inspection
After cleaning and drying, inspect the area to ensure all mold has been removed. Look for any remaining signs of mold and verify that the area is dry. If mold persists, repeat the cleaning process or consult a professional for further assistance.
Step 10: Rebuild and Restore
Once the area is confirmed mold-free, begin rebuilding. Replace removed materials such as drywall, insulation, and flooring. Consider using mold-resistant products to minimize the risk of future mold growth.
Step 11: Prevent Future Mold Growth
Preventative measures are essential to keep mold at bay. Maintain low indoor humidity (ideally between 30-50%), use exhaust fans in bathrooms and kitchens, and regularly inspect for leaks. Use mold-resistant products in areas prone to moisture.
Conclusion
Effective mold remediation involves a series of meticulous steps designed to identify, remove, and prevent mold growth. By following this guide, homeowners can effectively tackle mold issues, ensuring a healthier living environment. For extensive mold infestations, always seek professional mold remediation services to guarantee safe and comprehensive removal.